Setup a remote linux server, DDNS, MSI bios update
I am writing this blog to record a bad day with my new PC.
Hardware part
I have an MSI b550m mortar as a motherboard and a Ryzen 5900x as a CPU. But this motherboard bios do not support this CPU. So I need to replace it with my old Ryzen 1700x and update the bios by downloading the file from MSI’s official site and putting it in a USB root to update the motherboard from bios.
I have also accidentally removed my Win11 System EFI partition, so neither the GRUB on Ubuntu nor the boot manager from bios can wake my win11 up as it no longer possesses a boat loader.
I use a win11 iso file to enter the recovery mode and use the following command to recover this partition.
Boot your computer using the installation media or recovery disk. On the first screen.
- Enter the Command PromptRun the commands below to shrink a partition for
unallocated space:- diskpart - list disk - select disk # ( Select the disk where you want to add the EFI system partition.) - list partition - select partition # (Select the partition which you plan to shrink, or the place you want to create the efi partition) - shrink desired=100 (Shrink the selected partition by 100MB, you can give more if you want. If you have unallocated partition, you do not need this step)Run the following commands to create the EFI system partition with the unallocated space.
- create partition efi size=100 (allocate the unused partition)
- format quick fs=fat32 (EFI partition can only be fat32)
- assign letter=S (You may replace “S” with other letters which are not already used.)
- exit
Use the command below to copy the boot files from the Windows partition to the EFI system partition and create the BCD store in it:
bcdboot C:\windows /s S:“C” is the drive letter of the system partition and “S” is the drive letter you assign to the EFI partition. But you need to check from diskpart, as your windows main partition may not on C: if you have serveral disk
Internet Setup
What is a Dynamic DNS?
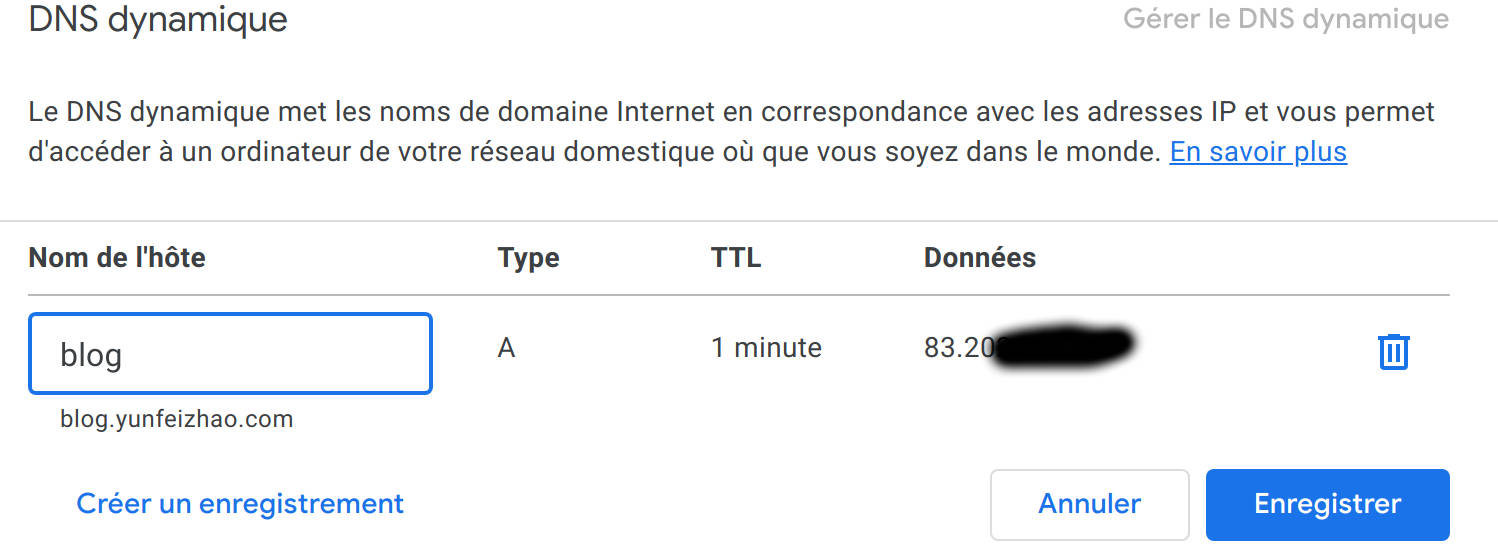
Dynamic DNS allows you to direct your domain a resource that has dynamically assigned IP address. You need to creat an A (for IPv4) or AAAA (for IPv6) record on your DNS server.

How to update DDNS
As we know that the public IP address attributed by our internet operator may be changed time to time, so we need to set a client program on our host, server, or gateway that does the following:
- Detects IP address changes
- Uses the generated username and password
- Communicates the new address to the Google name servers
Google domain provides an API to perform manual updates with the API by making a POST request ot GET to the following URL:
domains.google.com/nic/updateThe API requires HTTPS and here is an example request:
https://username:password@domains.google.com/nic/update?hostname=subdomain.yourdomain.com&myip=1.2.3.4The username and password correspond to the dynamic DNS you’ve created. The hostname is the domain name you want to attribute to your IP address. Finally, you need to detect your server IP address regularly. Once you notice your IP address is changed, you can use this API to change your DDNS table.
Send request by bash
We use curl command to make an https request to google.
GOOGLE_DDNS_USERNAME="your_google_ddns_username"
GOOGLE_DDNS_PASSWORD="your_google_ddns_password"
GOOGLE_DDNS_DOMAIN="your.domain.com"
ip=""
URL="https://$GOOGLE_DDNS_USERNAME:$GOOGLE_DDNS_PASSWORD@domains.google.com/nic/update?hostname=$GOOGLE_DDNS_DOMAIN&myip=$ip"


# update the record
curl -s $URL
Detect current IP address
To get our public IP address, we need to make request to external server.
The API I use is:
curl -s https://ipinfo.io/ipDo not disturb web servers
Now that we know the current IP address, we need to set an appropriate frequency to request the ipinfo.io and when we detect a change, we update our DDNS. The complete code is below.
google-ddns.sh
#!/bin/bash

GOOGLE_DDNS_USERNAME=""
GOOGLE_DDNS_PASSWORD=""
GOOGLE_DDNS_DOMAIN=""


# update up address
ip=$(curl -s https://ipinfo.io/ip)
FILE=./ipv4.txt
old_ip=""
if test -f "$FILE"; then
    old_ip=$(cat ipv4.txt)
fi


if [ "$old_ip" != "$ip" ]; then
    echo $ip > ./ipv4.txt
    echo $ip
    # update the record
    URL="https://$GOOGLE_DDNS_USERNAME:$GOOGLE_DDNS_PASSWORD@domains.google.com/nic/update?hostname=$GOOGLE_DDNS_DOMAIN&myip=$ip"
    curl -s $URL
fi
Launch the command every 30mins
We need to run the script above every 30 minutes to ensure that even if our public IP changes, we have to wait only 30 minutes to regain access to it.
I chose to use Systemd timers. Systemd is a software suite that provides an array of system components for Linux operating systems. The main aim is to unify service configuration and behaviour across Linux distributions.
systemd timer units provide a mechanism for scheduling jobs on Linux. The execution time of these jobs can be based on the time and date or on events. There is a google tutorial from “SUSE”
There are already many systemd timers that are part of system maintenance procedures that happen in the background of any Linux host. You can see then by command:
systemctl status *timerIn a nutshell, we need to create service and timer configuration files.
- google_ddns.service
- google_ddns.timer
On ubuntu these files are located in
/lib/systemd/system/We add following files in this folder.
google_ddns.service
[Unit]
Description="Run google DDNS updater script"

[Service]
ExecStart=/your_path/google-ddns.sh
google_ddns.timer
[Unit]
Description="Run google_ddns.service 5min after boot and every 30mins relative to activation time"

[Timer]
OnBootSec=5min
OnUnitActiveSec=30min
Unit=google_ddns.service

[Install]
WantedBy=multi-user.target
Manage timers using the systemctl command
systemctl status google_ddns.timer
sudo systemctl start google_ddns.timer
sudo systemctl restart google_ddns.timer
sudo systemctl stop google_ddns.timer
Once you start the timer, you will get something like this by showing the timer status.

All articles in this blog adopt the CC BY-SA 4.0 Agreement ,Please indicate the source for reprinting!